


Hello and welcome to the Etsy Register, a community created to revolve around your Etsy needs. I'm Starr from the blog A Thought Is The Blossom and the Etsy shop Action Is The Fruit, and today I'm going to show you how to get some professional-looking shoe shots without the professional lights and equipment. The photos still may not be magazine-worthy, but hopefully these simple tips will help you improve your shots leading to more sales in the future.
To get started all you need is two pieces of foam board, a camera, a piece of tape, and some sort of editing software (preferably Photoshop since that's what I'll be teaching with).
To get started all you need is two pieces of foam board, a camera, a piece of tape, and some sort of editing software (preferably Photoshop since that's what I'll be teaching with).
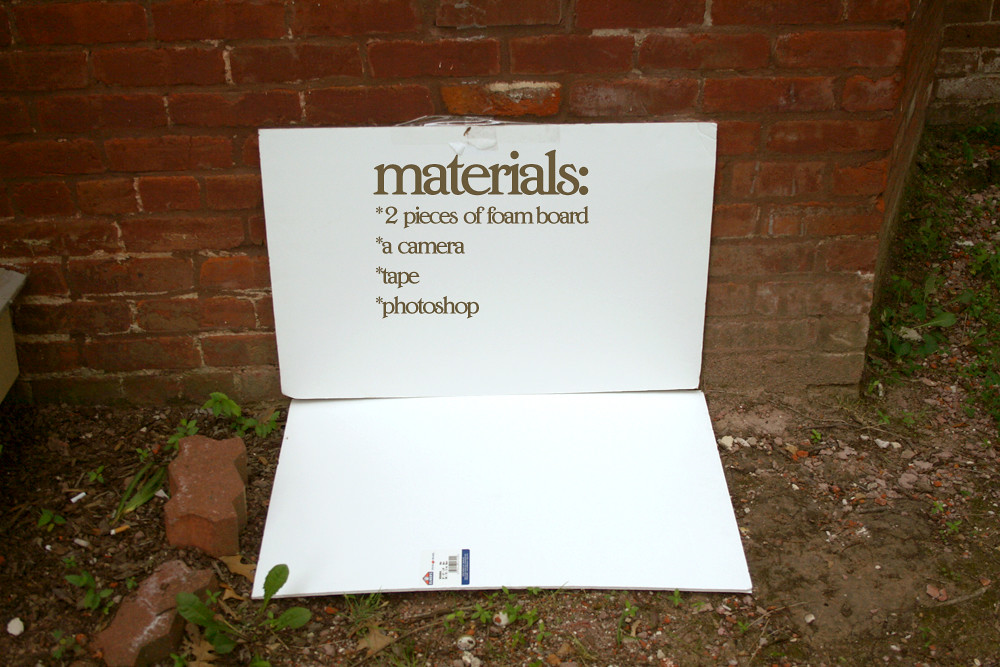
In order to get the best light without any expensive equipment, you'll probably want to do this outside. I did mine right next to the front porch.
You'll need to lay one board on the ground and tape the other to the wall above. The smaller you can get the gap between the two boards the better. The foam board I used on the bottom was a little bent, but just keep in mind that the straighter the board the easier it'll be to edit out the shadows.
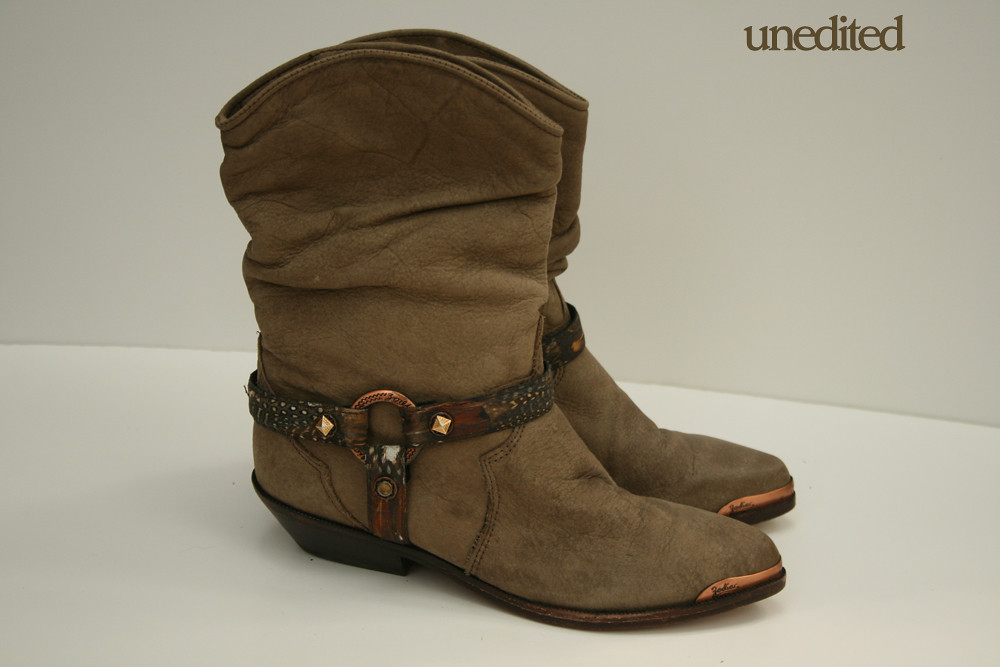
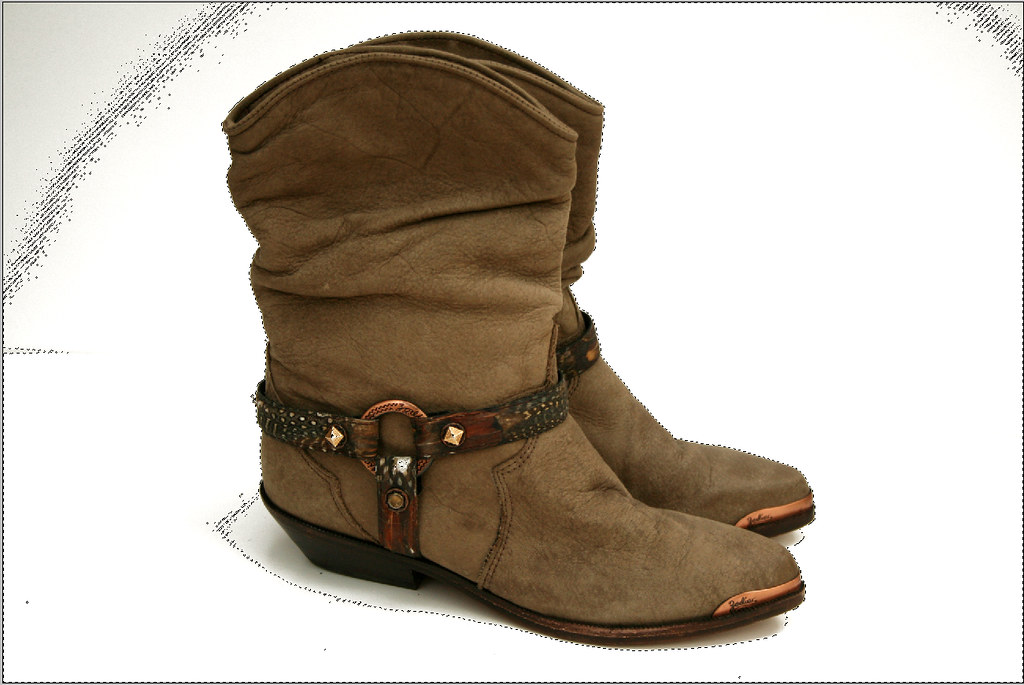
Once you set your camera according to the light, put the shoes on your board and get all the shots you need. You'll still see the line where the two boards meet, but you'll be able to get rid of that in Photoshop.
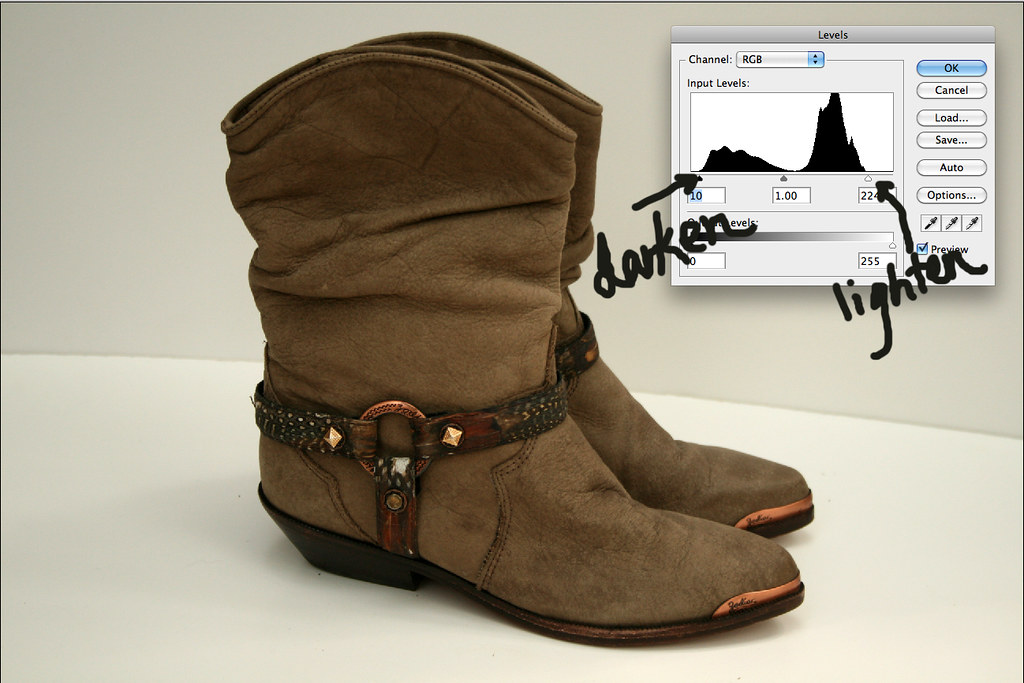
When you get your favorites picked out in Photoshop you'll want to click on the 'levels' tab which should be in the 'layers' box on the right side of the screen. If not, go to the 'window' tab, and click 'layers'. That should open the box for you. At the bottom of the 'layers' palette you'll see a round circle that's halfway shaded in. Click that circle and find the 'levels' tab.
Slide the tab over until it touches the black area. The tab on the right will lighten the photo, and the tab on the left will bring some color in.
Next you'll want to find the 'curves' tab; It's located just below 'levels'. To know where you need to brighten, click on the darkest part of your photograph which in this case is that top right corner for me. When you click and hold, the dot will show up where it needs to be. Raise it until the photo is whiter making sure not to go too bright. This will just blow your photo out.

Next up is 'color range'. You'll find this under the 'select' tab at the top of the page. Make sure that it's set on 'selection', and slide the tab over until the shoes are completely black. You don't want the shoes to have any white in them at all or your photo won't turn out right. I couldn't get a screenshot of what it's supposed to look like, but it should work on your shoes so long as they don't have any white in them.
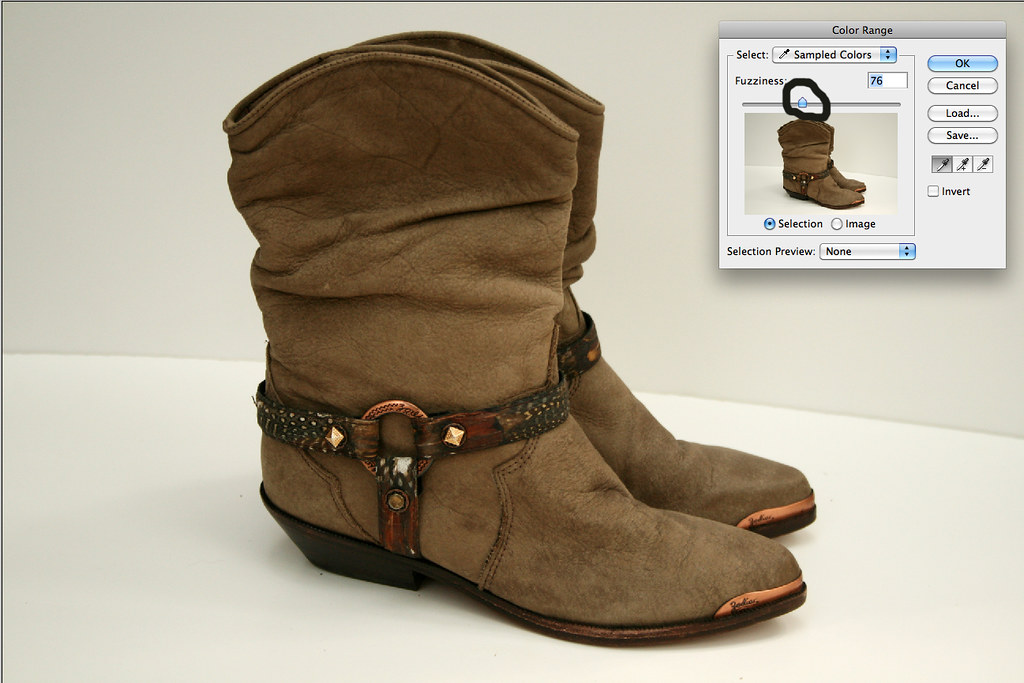
This will select the background. Make sure that your 'layers' palette is on the 'background' option, and that your color option at the bottom of the 'tools' palette is set on white, then click the delete button. This should make the background white.
In my photo there was still a small off white area in the corners. Click 'deselect' under the 'select' tab at the top of the page, then go to the 'tools' palette on the side of the page and click the 'brush' tool.
Make sure your color is still set on white, then erase the left over color with your mouse. There may be a little color left over from the shadow of the shoes, but I wouldn't worry about that. It's way more trouble than it's worth!

Finally, you'll have your finished product.

Hopefully this will help you with your Etsy photos, but keep in mind it won't work the same for shoes with white in them. I'm still trying to figure that one out, and if any of you have any tips feel free to share them with me! If you have any trouble or questions you can email me at starrcrow@live.com.


you are a bloody genius!!! i'd never even thought of doing this but i def be using this trick in the future. thanks starr!
ReplyDeleteyeah, this is pretty dope. do you use a mac??
ReplyDeleteto avoid all the extra editing you can simply create a seamless background. replace the two pieces of foamcore with one large sheet of white paper or posterboard bent gently so the bottom half rests on the ground or floor and the top half is supported by the wall. this is how studio photographers set up for all sorts of shoots. just on a much larger, more professional/expensive scale. kind of like this:
ReplyDeletehttp://www.istockphoto.com/file_thumbview_approve/11081606/2/istockphoto_11081606-white-seamless-back-drop-studio-set-up.jpg
This is great! I cannot get over what a fantastic idea for a blog this is. I am so coming here daily!
ReplyDeleteThat was brilliant Starr. Thanks for the tips.
ReplyDeleteLulu Letty
Excellent post Starr! You're such a gem!!
ReplyDelete<3
mamushka marie
barefootandvintage: thank you, and yes I use a Mac.
ReplyDeleteJuliamarisa: Thanks for the tips! I'll definitely be trying that next time to see if I can't get rid of a few of those steps.
Ooh, can't wait to try this! Thank you :D
ReplyDelete